Do you want to learn how to solder copper pipes like a Pro? You should definitely take advantage of our Balkan Training Program. In this program, we show you how to solder copper pipes the right way. But first, let’s cover a little bit about what soldering is and why it’s such an important skill to have.
Soldering is a process that uses heat to join metal parts together by use of a joining solder material. It’s commonly used in plumbing for water supply lines, and in metalworking projects. Soldering is a skill that every plumber should know. Soldering creates a strong and watertight bond between two metal surfaces when done correctly. But before we get to actual soldering, the first step is cutting and prepping your copper pipe properly.
Today, we’ll cover the basic 4 steps of how to solder copper pipes: cutting and preparing the pipe, cleaning, fluxing, and finally the torching and soldering process to make the bond. Unlike flaring K copper for water service line connections, interior copper water lines are soldered.
Remember to read our vital advice regarding safety after the 4 points of soldering. Let’s get started, shall we?
The Basics Of How To Solder Copper Pipes
A solder is a metal alloy that is melted and then applied to two metal surfaces, which creates a leak-free joint. When soldering copper water piping, the solder fills a capillary between the pipe and the fittings that are connected together.
It’s crucial to prepare the surfaces correctly so that the solder can adhere properly. No matter how expert a person is at the actual soldering, if the surfaces are not prepared correctly, the solder will not be leak-free.
Patience is also key, as you need to allow sufficient time for the solder to cool and form a strong bond. If you rush through the process, you’re more likely to have leaks down the road.
The 4 Steps On How To Solder Copper Pipe
Now that you know the basics, it’s time for the actual tutorial. Here are the four steps you need to follow in order to solder copper pipes like a pro:
1. Cut And Prep Your Copper Pipe
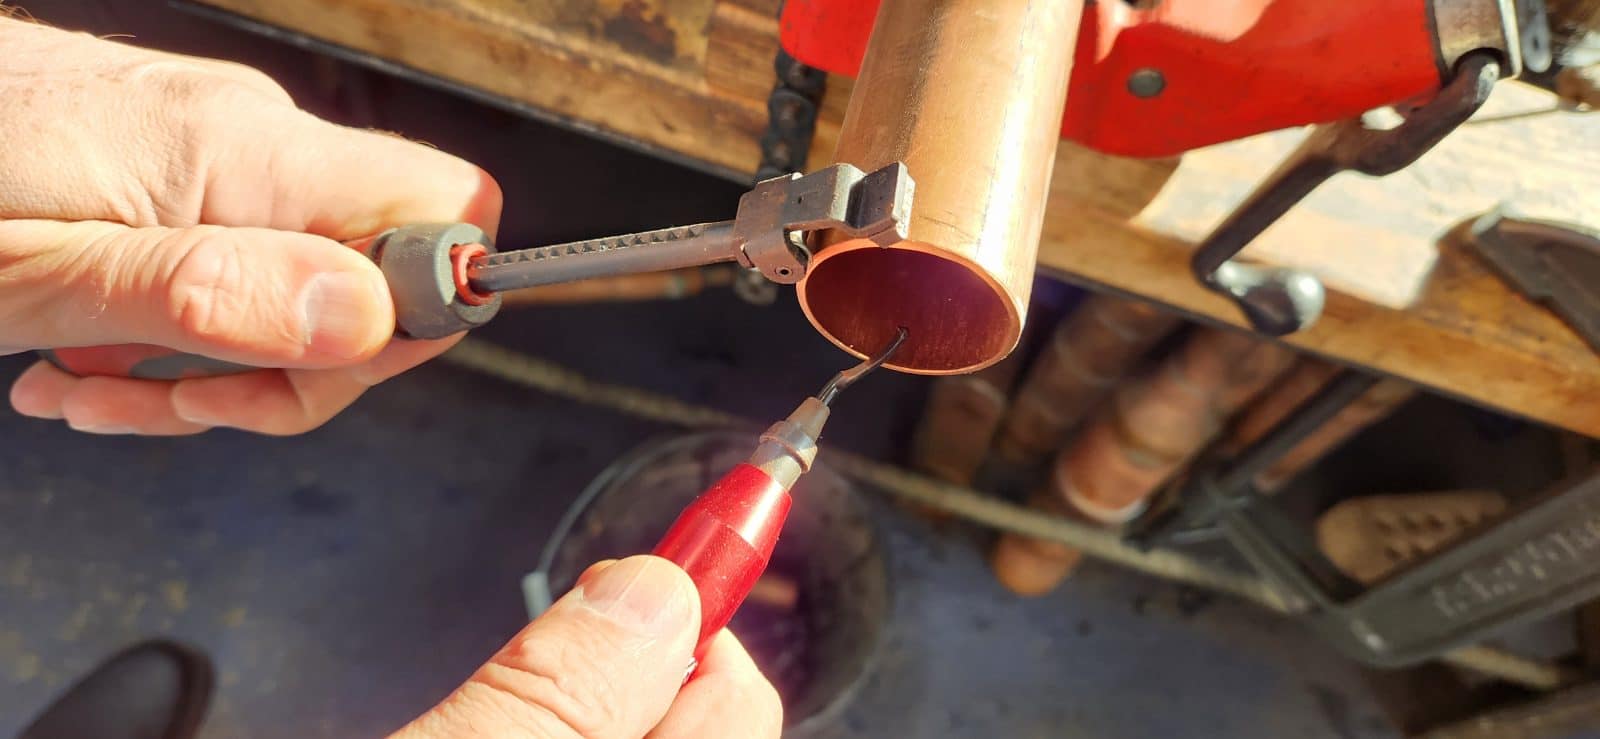
Make sure to cut it to the correct length and remove any burrs on both the inside and outside of the pipe. When cutting copper pipes, you will need a few tools. A hacksaw or pipe cutter can potentially do the job, but you should prefer to use a tubing cutter for a cleaner cut.
Every time you cut copper pipe you will create a burr on both the inside and outside of the pipe. Both burrs must be removed to allow for the unobstructed flow of water, and for the fitting to connect properly to the pipe itself.
2. Clean The Copper Pipe & Copper Fitting
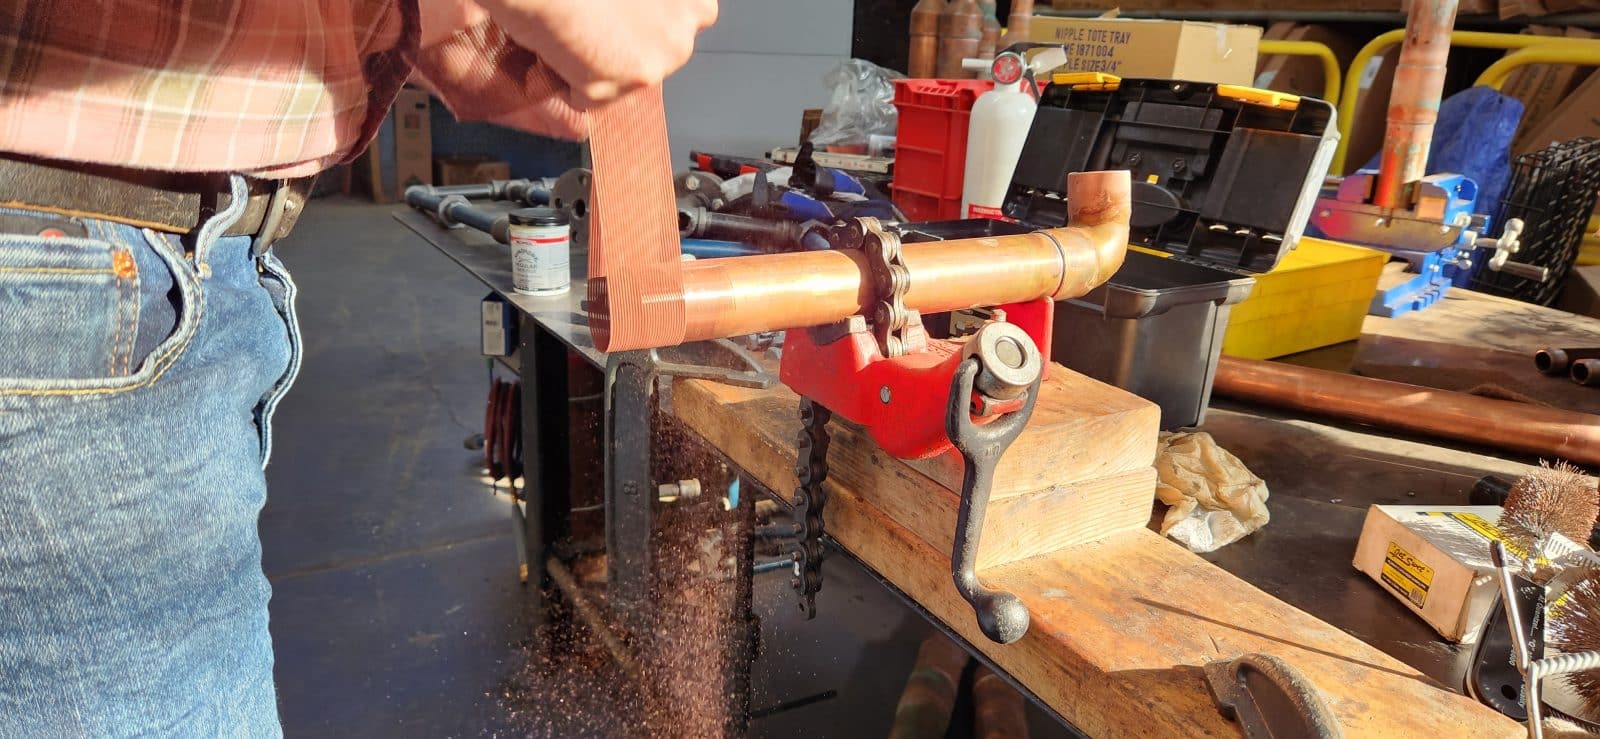
Use a sanding cloth, a scotch pad, and a wire brush to remove any oxidation from the outside of the pipe and the fitting. It’s essential to have a clean surface for the solder to adhere properly. After you sand and brush the pipe and fitting, use a clean cloth to remove the residual debris.
Never touch the cleaned area with your hand (whether wearing a glove or not). Likewise never place the cleaned copper on a dirty surface. One of the primary reasons a solder joint fails is because the cleaned pipe or fitting gets contaminated prior to the fluxing or soldering.
3. Apply Flux To The Copper Pipe & Fittings
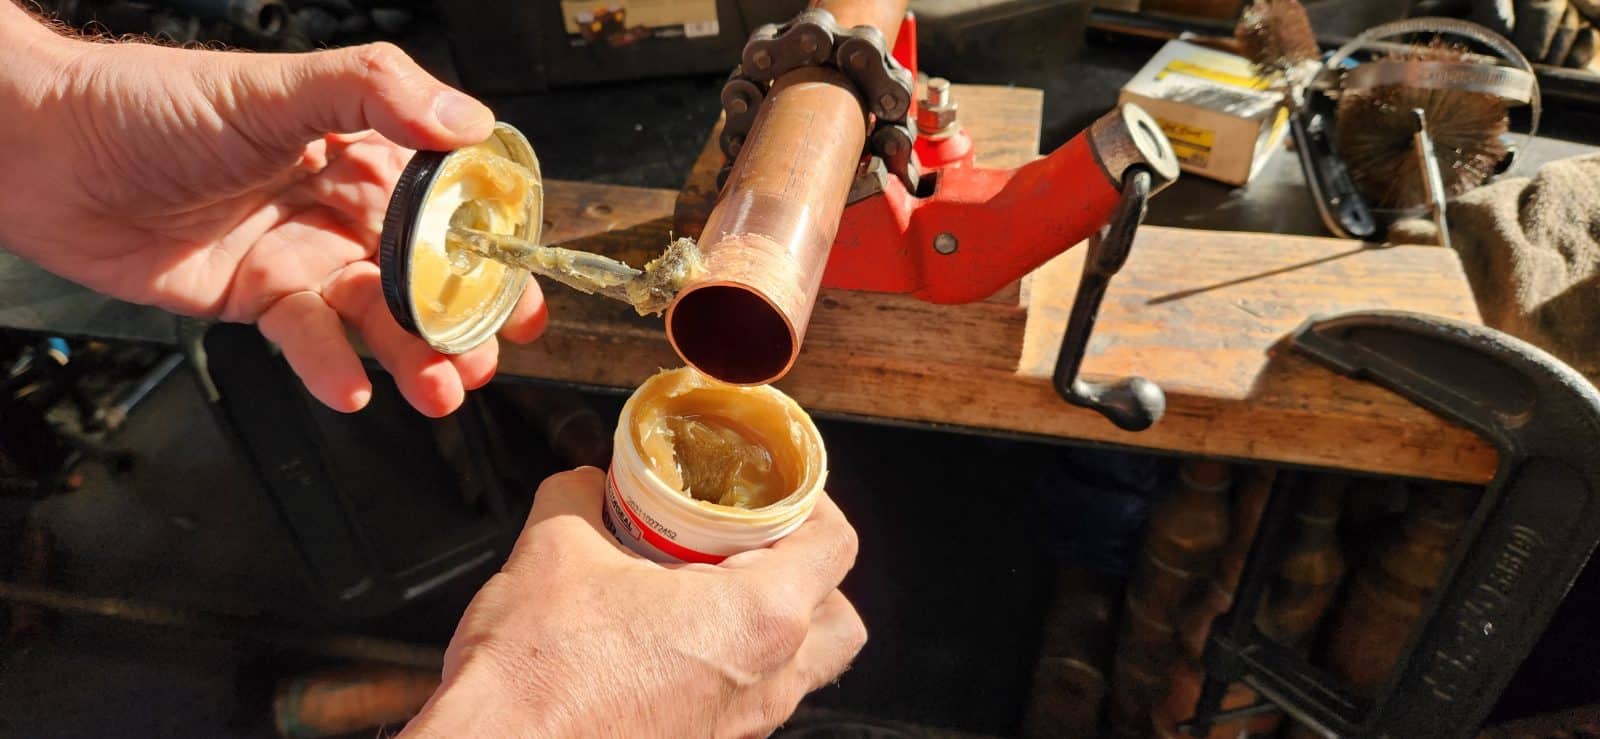
This step is crucial in order for the solder to adhere properly to the pipe. Flux is an acidic and corrosive substance that cleans the metal and helps the solder bond with the pipe. Make sure to apply the flux evenly to both the inside of the fitting, and outside of the pipe as well. Flux prevents oxidation of the copper, which would cause a failed soldered joint.
There are two types of flux: rosin flux and acid flux. Rosin flux is the most common type and is safe to use on most surfaces. Acid flux should only be used on very dirty or corroded surfaces. To prevent your tub of flux from getting contaminated, do not dip your brush repeatedly into your tub of flux.
Set aside the lid on the tub of flux and use it as a painter would use a pallet. Dip the brush into the lid of flux, and only use what is required. Throw out the excess flux in the lid once that particular project is completed.
4. Heat The Copper Pipe And Fitting
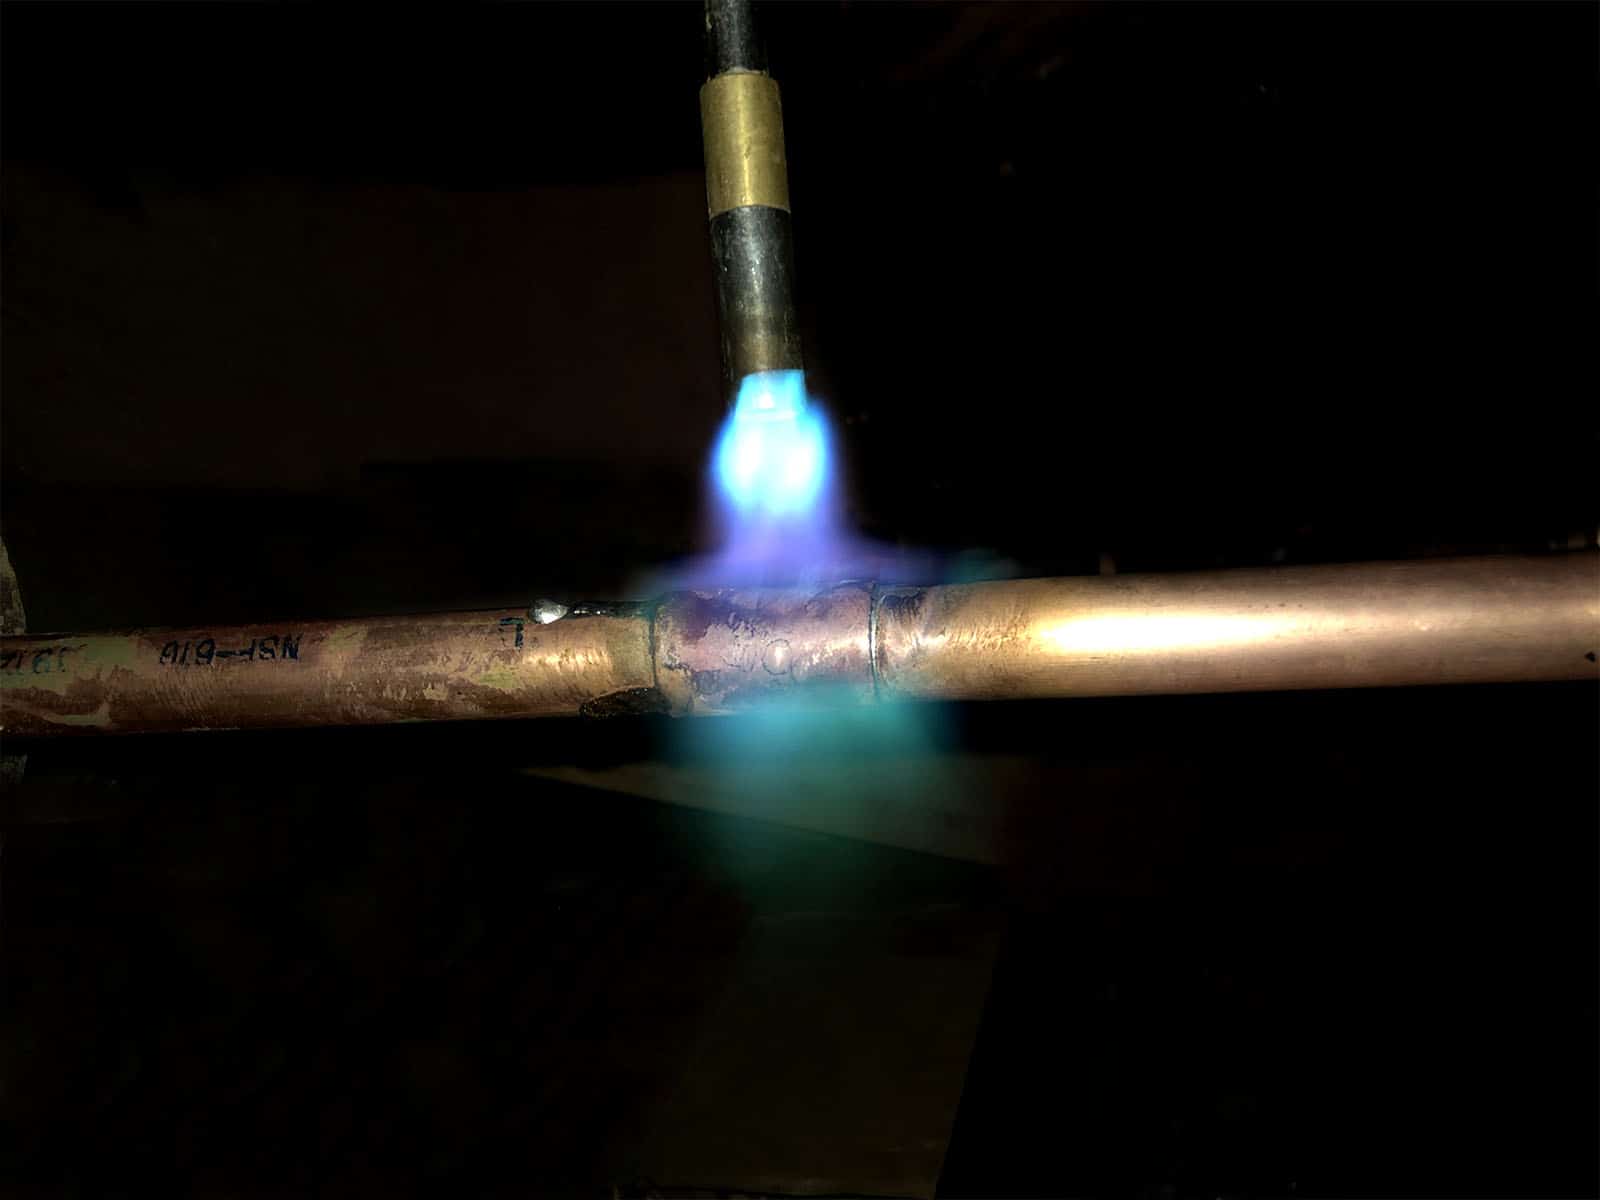
You will need to use a torch to heat the pipe before attempting to solder copper pipes. Start by heating the area of the pipe itself where it is entering the fitting. This will expand the pipe and create a smaller capillary to fill with solder. Then heat the fitting where the pipe enters the fitting.
On copper pipes larger than 1 1/2″ or so, you will have to heat the fitting and pipe a section at a time. Once the area is hot enough, the copper usually turns colors to a rainbow-like color. You can touch the solder to the joint to test out the level of heat. If it is not hot enough, you can always reapply the torch.
If you overheat the joint it’s possible to burn the copper fitting and burn away all of the flux. In other words, never overheat your copper pipe or fitting. Once you touch the solder to the pipe and it melts, allow it to flow into the capillary between the fitting and the pipe.
Continue to heat the pipe as needed until the solder has melted and bonded with the pipe. When soldering, it is recommended to remove the flame when you apply the solder as a safety precaution.
For a watertight joint, ensure that you use the correct torch and gas to melt solder properly, and make sure the solder fills the void between the pipe and the fitting by capillary action. Finally, make sure to allow the solder to cool properly, and then clean off any excess flux.
How To Solder Copper Pipes Using 8 Safety Tips
When you’re soldering copper pipes, it’s essential to follow some basic safety precautions. Here are a few tips to keep in mind in order to know how to solder copper pipes:
- If you’re trying to solder copper pipes inside a finished wall, use a heat shield to protect the wall or insulation from the heat of the solder.
- Always wear eye protection when soldering. Hot solder and metal shards can be harmful, and you don’t want anything to get in your eyes.
- Purchase welders gloves to protect your hands from the heat of the torch. Cloth gloves are not advisable.
- Always have a fire extinguisher on hand in case of a fire. A proper fire extinguisher should be rated A, B, and C.
- Allow the joint to cool before testing it. If the joint is still hot, it could break when you test it or, worse, burn you. Applying some more flux is a good way to slowly cool down a hot joint.
- Always wear a long-sleeved shirt with no open pockets. A short-sleeved shirt can result in a burn on your arm. While an open-pocket shirt could hold random hot solder. That would give a whole new meaning to the term “hot pockets”.
- Wear work boots that extend above your ankle. That prevents hot solder from falling and going inside your shoe. Certainly an unpleasant experience!
- Purchase a non-flammable drop cloth to leave a nice clean work site.
Following these simple tips about how to solder copper pipes safely to help ensure a successful soldering experience.
An Inside Look at the Team Balkan Training Program
Whether you want to improve your skills as a plumber or you want to gain a new skill, we’ve got you covered. Team Balkan has an in-house training program that can teach you everything you need to know to be a successful Balkan Team Member or general plumber
Our training programs are designed to teach you everything you need to know to become a successful part of our team, or successful at helpful skills around your home. This article is just an example of Balkan teaching you how to solder copper pipes to create a strong and lasting soldered joint. Walking you through every step of a process is “The Balkan Way”.
So whether you’re a seasoned pro or a complete beginner, our training programs have something for everyone. Let’s now get down to business, shall we?
Why is This Training Program Important?
This training program is crucial because it can help our team maintain Balkan’s high standards, but it can also teach the general public valuable trade skills. These are skills that can lead to career advancement. Not to mention, soldering copper pipes is a valuable skill for any property owner.
So if you’re interested in learning how to solder copper pipes, we’re hoping our in-house training program did just that. This is an excellent opportunity to learn from the experts, and you’ll get to put your skills to the test in a real-world setting.
A Positive Conclusion & Plumbing Skills Learned
After reading this article, we hope that you have a basic understanding of how to solder copper pipes. If you have any questions, please do not hesitate to reach out to us. We are more than happy to help.
Solder copper pipe like a pro with our in-house training program. Whether you’re a member of our team or just interested in learning more, this is the place to be. We’ll teach you everything you need to know, from preparing the pipe to applying the solder.
We know that soldering can seem intimidating and frustrating at times, but it’s really not that difficult. With a bit of practice, patience, and safe practices, you’ll be able to solder copper pipe like a pro. Thanks for reading and watching!
