Water can enter a basement and cause basement flooding for many reasons, and water can come from many sources. Water damage can be expensive to repair, and it may include correcting structural damage or eliminating a mold condition. In many instances, a seemingly slight defect can be the cause of a serious unwanted water condition. The following 4 steps are easy to follow, require no special tools, and require very little skill.
1. Making a sewer access pit water-tight
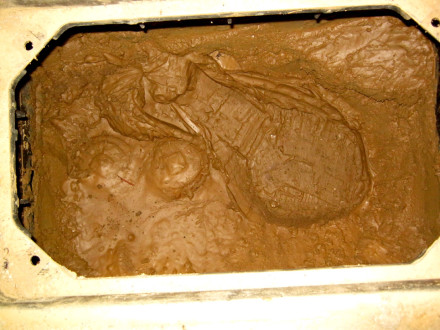
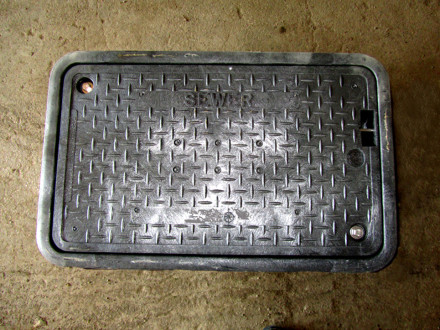
In most properties, the house sewer is located under the floor of a basement which is below grade. Near the front of the foundation wall is a sewer trap which is located inside what is referred to as an access pit. If the access pit is not sealed properly it can permit water and mud to enter your house during heavy rain or if there is a high ground water table. A sewer access pit that is not watertight is a prime cause of basement flooding.
Making a sewer access pit waterproof can be a simple process. If the walls of the pit are sound it may be as simple as cleaning the bottom of the pit and around the caps of the house trap. Remember that the caps or plugs must always remain accessible for cleaning. If there is a sewer check valve in the pit the cover for that must also remain accessible.
Simply place a layer of concrete in the bottom of the pit and up to the walls. Using a premixed concrete mix of 5,000 PSI concrete is advisable because it is much better at preventing water penetration. If the walls of the pit are porous there are waterproofing products such as hydraulic cement available to coat the existing walls.
If the access pit is in generally poor condition it may have to be replaced. If that is the case the product of choice is a precast composite access pit with a fitted cover. Composite pits are waterproof and do not require masonry skills to install. Always remember to cement the bottom of the pit to ensure it is water tight. Unwanted water can enter an access pit form the bottom, just easily as form the sides. If replacing the entire sewer access pit is required and seems beyond your skill set, it may be better to hire a professional to ensure your water problem is solved.
2. Making sure the sewer trap is water-tight
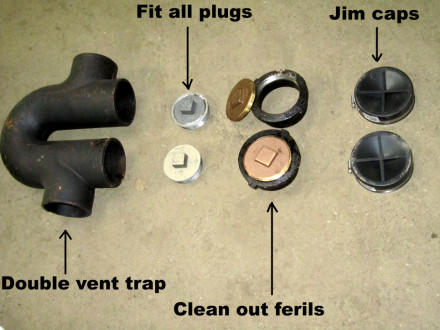
Frequently a house trap for a sewer will have plugs or caps on it that are not quite water-tight. Even a slightly misfitting cap or plug can be the source of water, sewer gases, rodents, and insects. In terms of water damage even a slight gap can allow a great amount of water to flood your basement during a heavy rainfall.
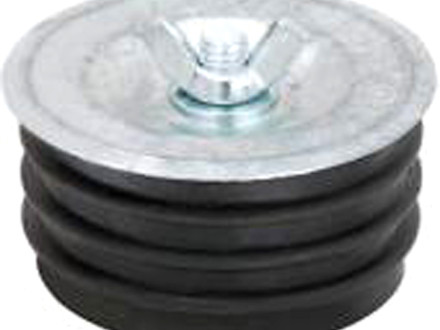
Changing old sewer caps or plugs is a very easy process that requires no special tools and is extremely inexpensive to do. The difference between a plug and a cap is that a cap fits over the outer edge of each opening of the trap while a plug fits into the opening. It is recommended that when a cap needs to be replaced that a wing nut test plug is used. A wing nut test plug is made from rubber and stainless steel, others are made entirely from rubber and hardened plastic. Either style is recommended and will provide a long-lasting and water tight fit. Tightening the wing nut by hand allows the ribbed rubber to conform to the exact size of the inside of the trap clean-out. A small wrench can be used for an extra turn or so, but is not really necessary.
These plugs are extremely water-tight as opposed to typical brass sewer trap plugs. Therefore when a trap plug or cap must be replaced it is recommended that a wing nut test plug be used. These types of plugs can be easily tightened, are extremely dependable, water-tight, and are inexpensive. In addition, they obviously are very easy to both install and remove. The plug pictured on the right is manufactured by Matco-Norca.
When making a house trap water-tight never try to save a couple of dollars at the risk of an improper repair and continued basement flooding. All sewer trap plugs and caps are very inexpensive, last for many years, and can save thousands of dollars in potential damage.
3. Sealing utility lines that pass through the basement wall
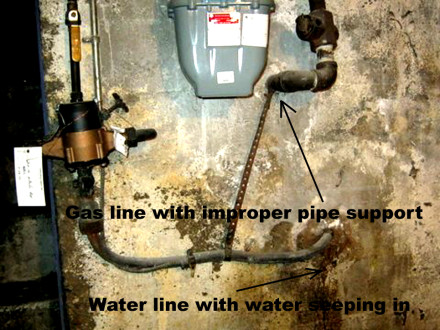
Another common source of water penetration into a basement is formed where utility lines pass through your foundation wall. Typical utility lines that may enter your house through a foundation wall are gas, electric, and your water service lines. In Manhattan and some other areas telephone and cable lines may also run underground. Any utility line owned and maintained by a public utility company is the responsibility of the utility company themselves to ensure a water-tight fit into a building. Never attempt to work on or around a public utility line. Not only will you be risking damaging the utility line, but you are risking serious injury as well.
It water is seeping through where the water service line enters your property you are usually responsible to seal the leak – the NYC DEP has no responsibility pertaining to water service lines. Sealing around a water line requires some care and a little skill. The correct way to make a permanent repair is to carefully clear away all existing concrete to a depth of at least 2″ around your water line. This must be done carefully using tools such as a hand chisel and a small hammer. Never use a power tool to remove concrete around a water line as you will risk disturbing or breaking the water line.
Once the area to be patched is cleaned out it is ready to be plugged. Do not use regular cement – use hydraulic cement such as water plug. Hydraulic cement if used properly will actually stop running water in many cases, but it is advisable to work on dry areas. When using hydraulic cement the directions must be read and followed carefully. Hydraulic cement is a quick-setting cement that has chemical additives. Rubber gloves must be worn to avoid contact with your skin – hydraulic cement can dry out and crack your skin by taking all the moisture out of it. Hydraulic cement must be mixed in very small batches or it will set up and dry before you even have a chance to put it in place.
Using the right product in the correct manner will make a permanent and long-lasting repair. Permanently curing a water condition can be accomplished in a few minutes in many cases.
4. Rerouting outside roof leader lines
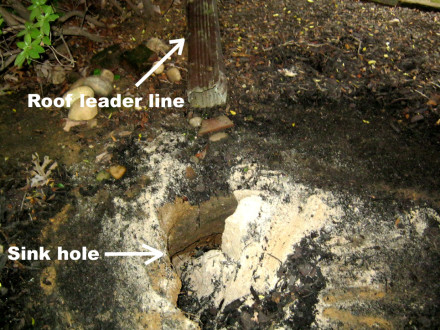
Perhaps the easiest situation to address is when a roof leader line lets out on the ground just outside of a foundation wall allowing water to seep into a basement. In most cases, an extension can be placed over the end of the roof leader line directing the water away from the foundation wall.
Another solution is to place a non-permeable filter fabric under the ground of the affected area to address the situation. The term non-permeable means it will not let water pass through. If placed about 1′ under the finished grade of the yard top soil and grass can still be put on top of the fabric, yet a water condition can be properly resolved. This type of filter fabric is available from plumbing supply houses and many home supply stores and is not very costly.
In some extreme cases a roof leader line may have to be completely relocated to another section of a roof gutter away from the water condition. This is probably a job for an insured contractor. Once again it must be stated, never risk injury or an improper job just to save a few dollars.
A final piece of advice about basement flooding
Water conditions can be maddening but one should never rush in and throw money at a water problem. It can be hard to track the cause of water entering into a basement but spending money on an unnecessary or improper repair will not help matters. The above four steps are not costly or time-consuming but they may not apply to your condition or resolve your particular situation. It is strongly suggested for complicated basement water issues that licensed, insured, and highly experienced contractors be called in and you carefully consider your options before making a hiring decision.


